If you aren’t using a VPN yet, it’s time to get started. There are many uses for a VPN, but the most important thing is security. I would not dare to connect to an open hotspot, e.g. in a cafe or train station, without an active VPN connection. There are many VPN service providers, but if you have a Mikrotik router, you can set up such a server at your home or office. I will try to introduce you to the advantages and disadvantages of VPN in the next post. Now we will focus on configuring Mikrotik OpenVPN Server.
Connections Diagram

Openvpn Server Configuration
First we have to generate 3 certs(CA, Client and Server). From left menu click on System->Certificates. If you have other CA you dont need to create new one, just import it. In this tutorial our Mikrotik will be also CA.
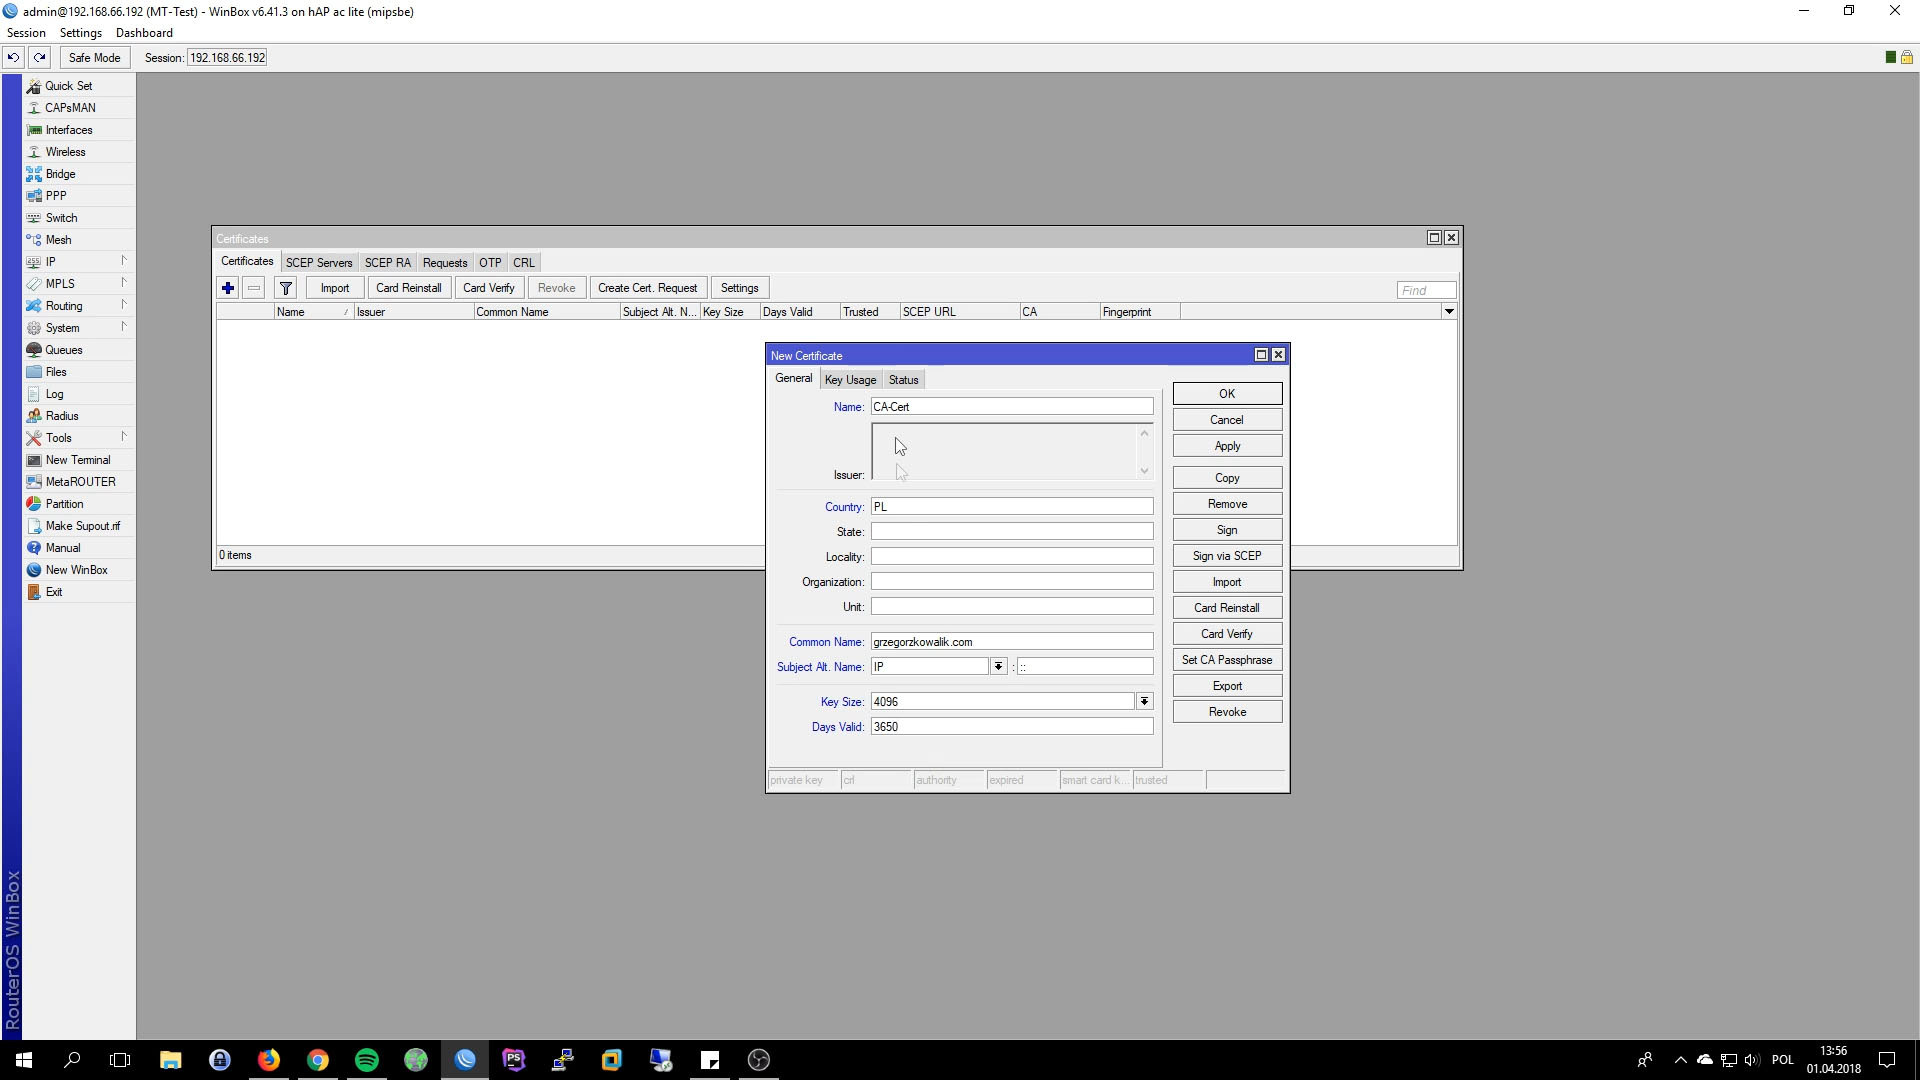
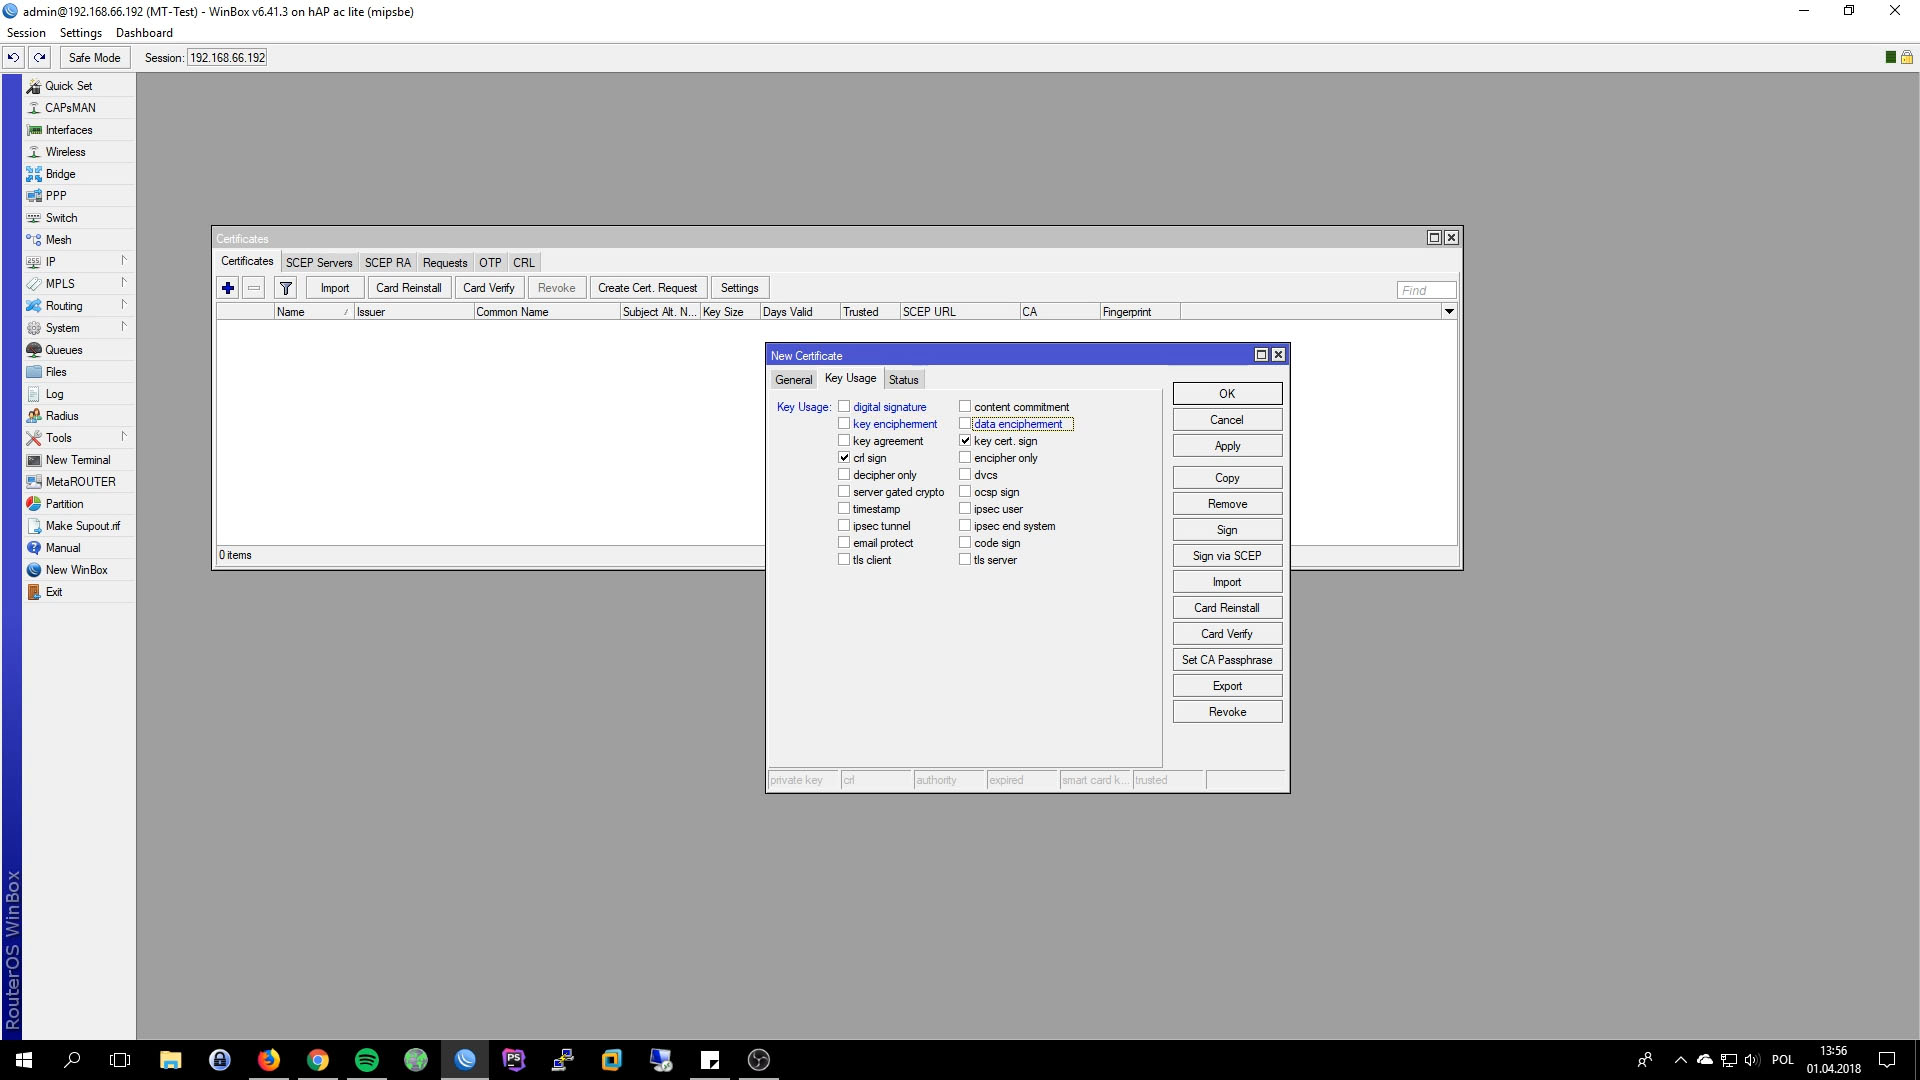
- Name: set anything you want
- Common Name: domain name or public ip
- Key Size: 4096
- Days Valid: 3650, 10 years
- Key Usage: key cert sign, crl sign
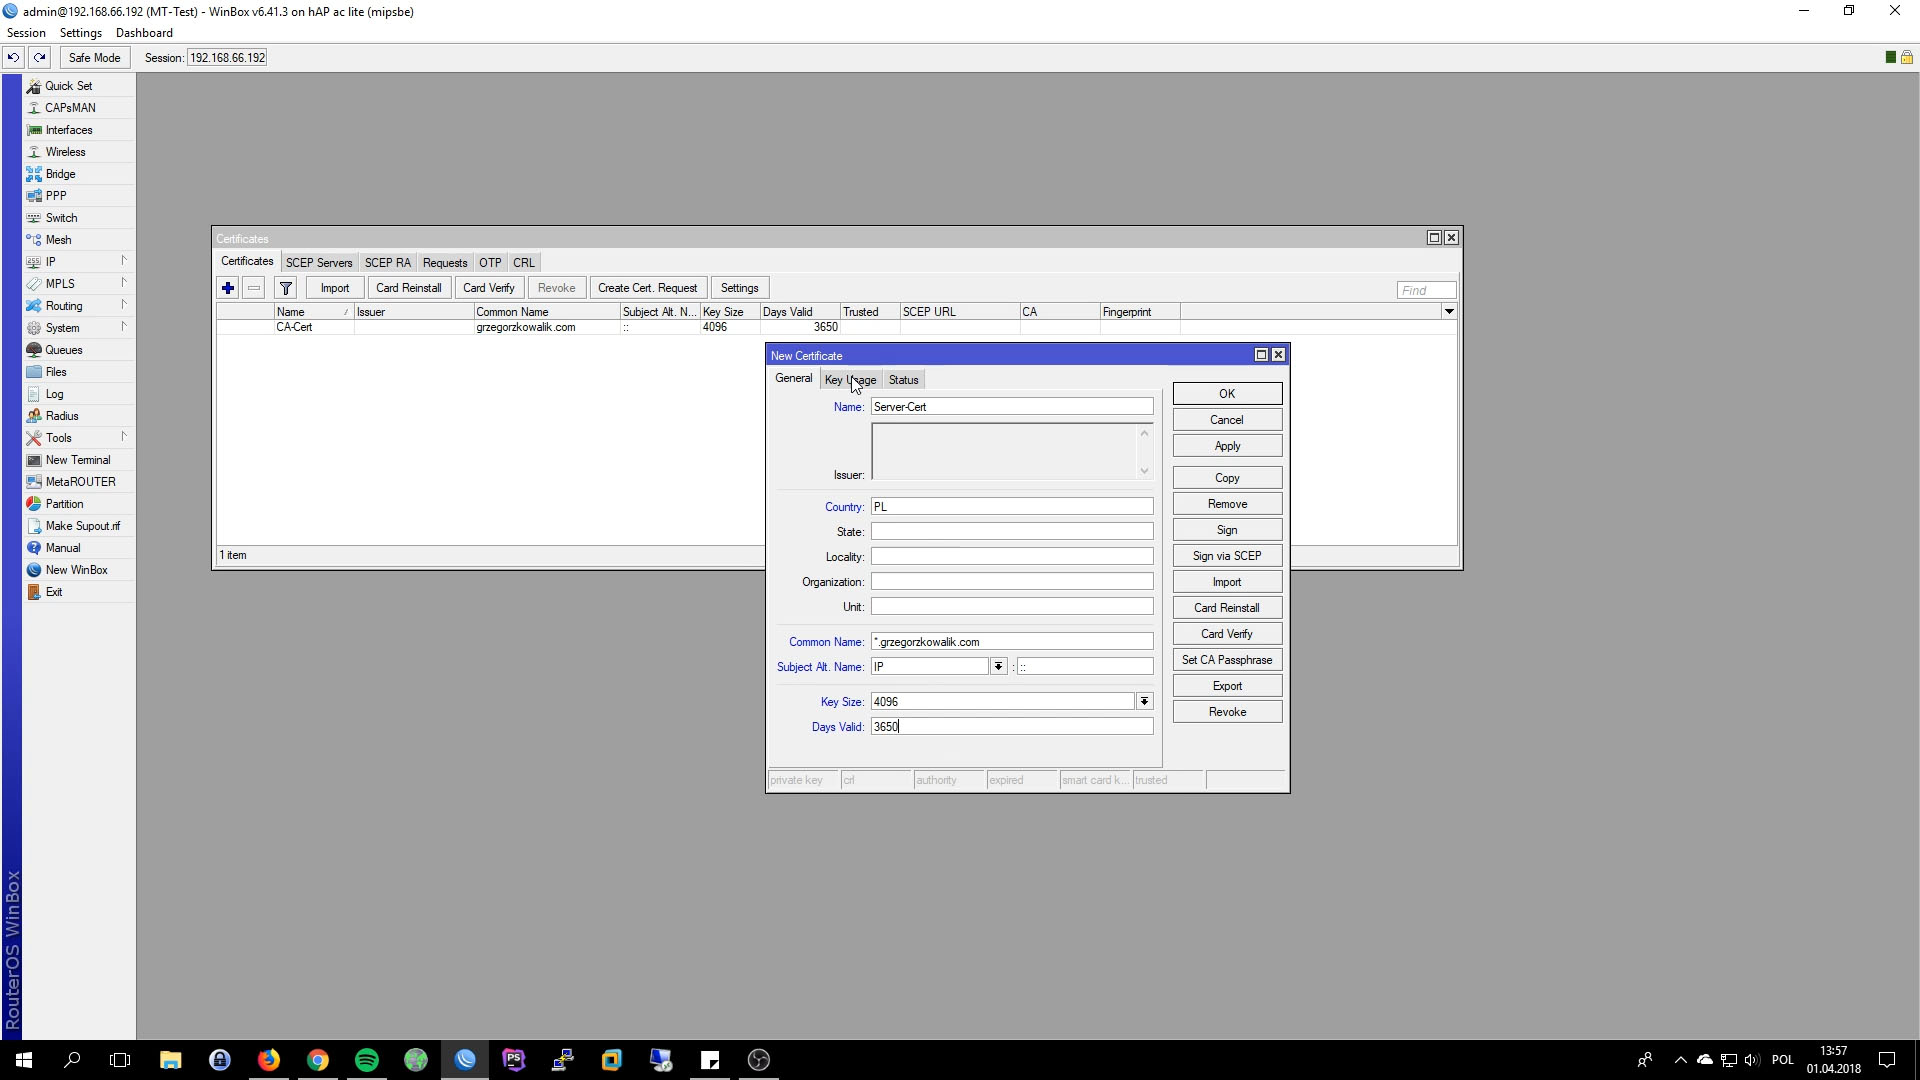
Preparing Server Certificate
- Name: type anything
- Common Name: *.grzegorzkowalik.com(wildcard cert)
- Key Size: 4096
- Days Valid: 3650(10 years)
- Key Usage: digital signature, key enciphement, data enciphement, tls server
Preparing Client Certificate
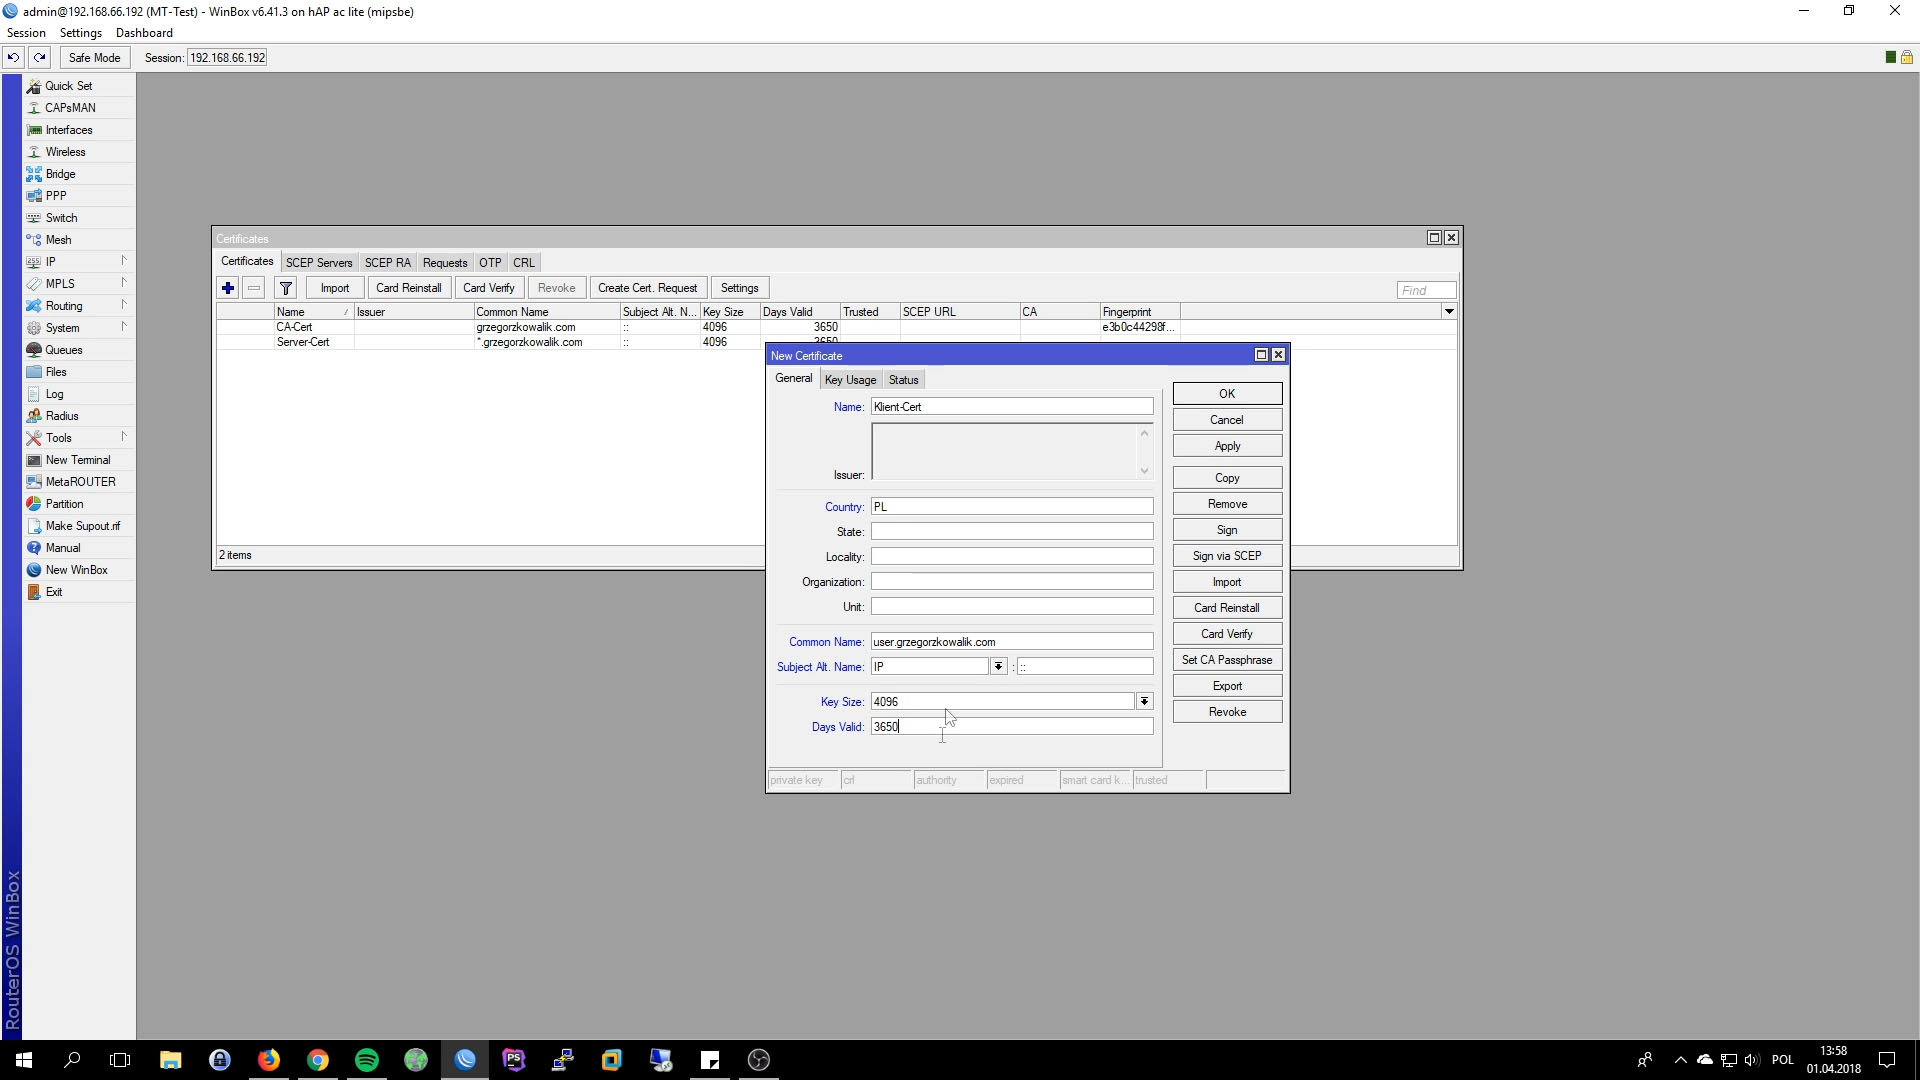
- Name: type anything
- Common Name: user.grzegorzkowalik.com
- Key Size: 4096
- Days Valid: 3650(10 years)
- Key Usage: tls client
Signing Certificates
In the next step, we have to signs our certificates. Depends of using hardware, router CPU can increas very highly also signing process can take serval minutes. We can sign our certificates in two ways. Using console and Windbox. When we are using console, very often you can see timeout, my advise is to look at cpu utilizating, when it go downs, signing process is complete.
Our CA we will sign in terminal:
sign CA-Cert name=CA-Certificate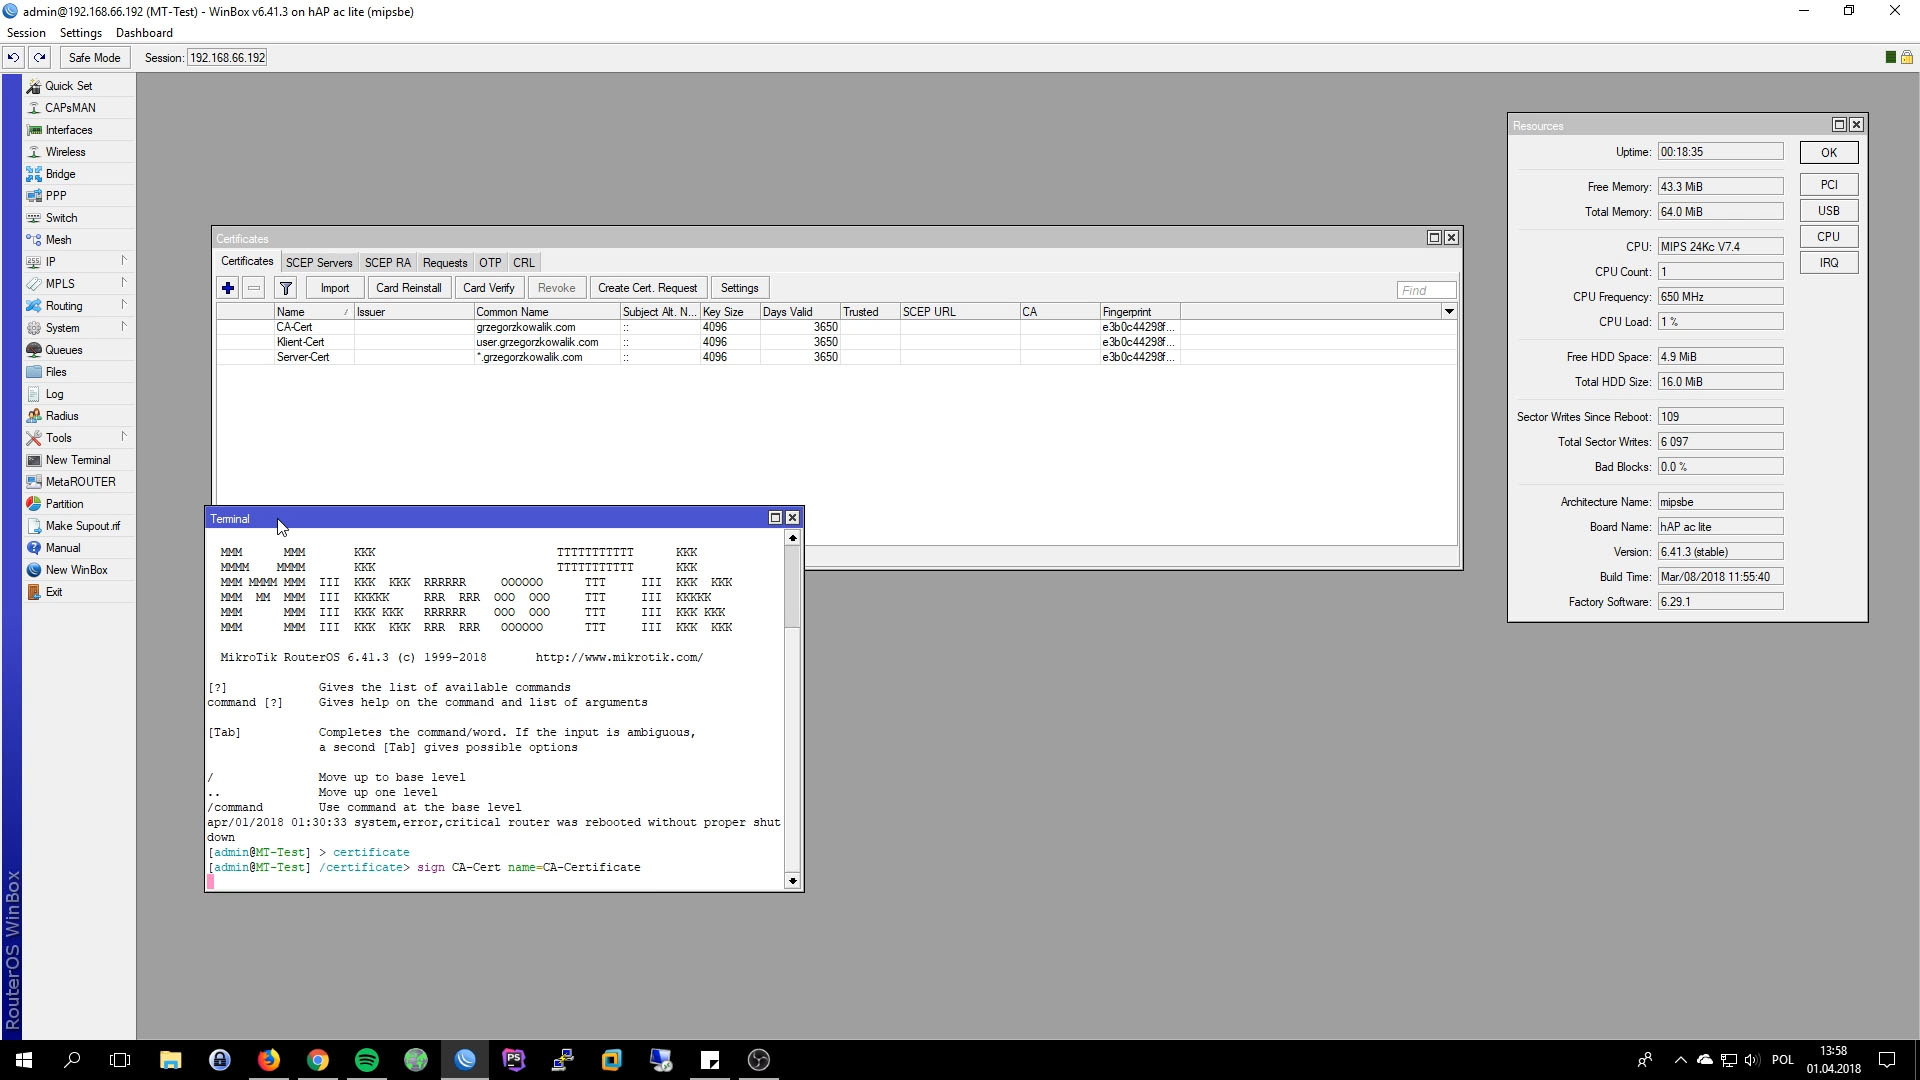
Server and Client certificate we will signing in Winbox. Right click on certificate, then Sign.
Export Certificates
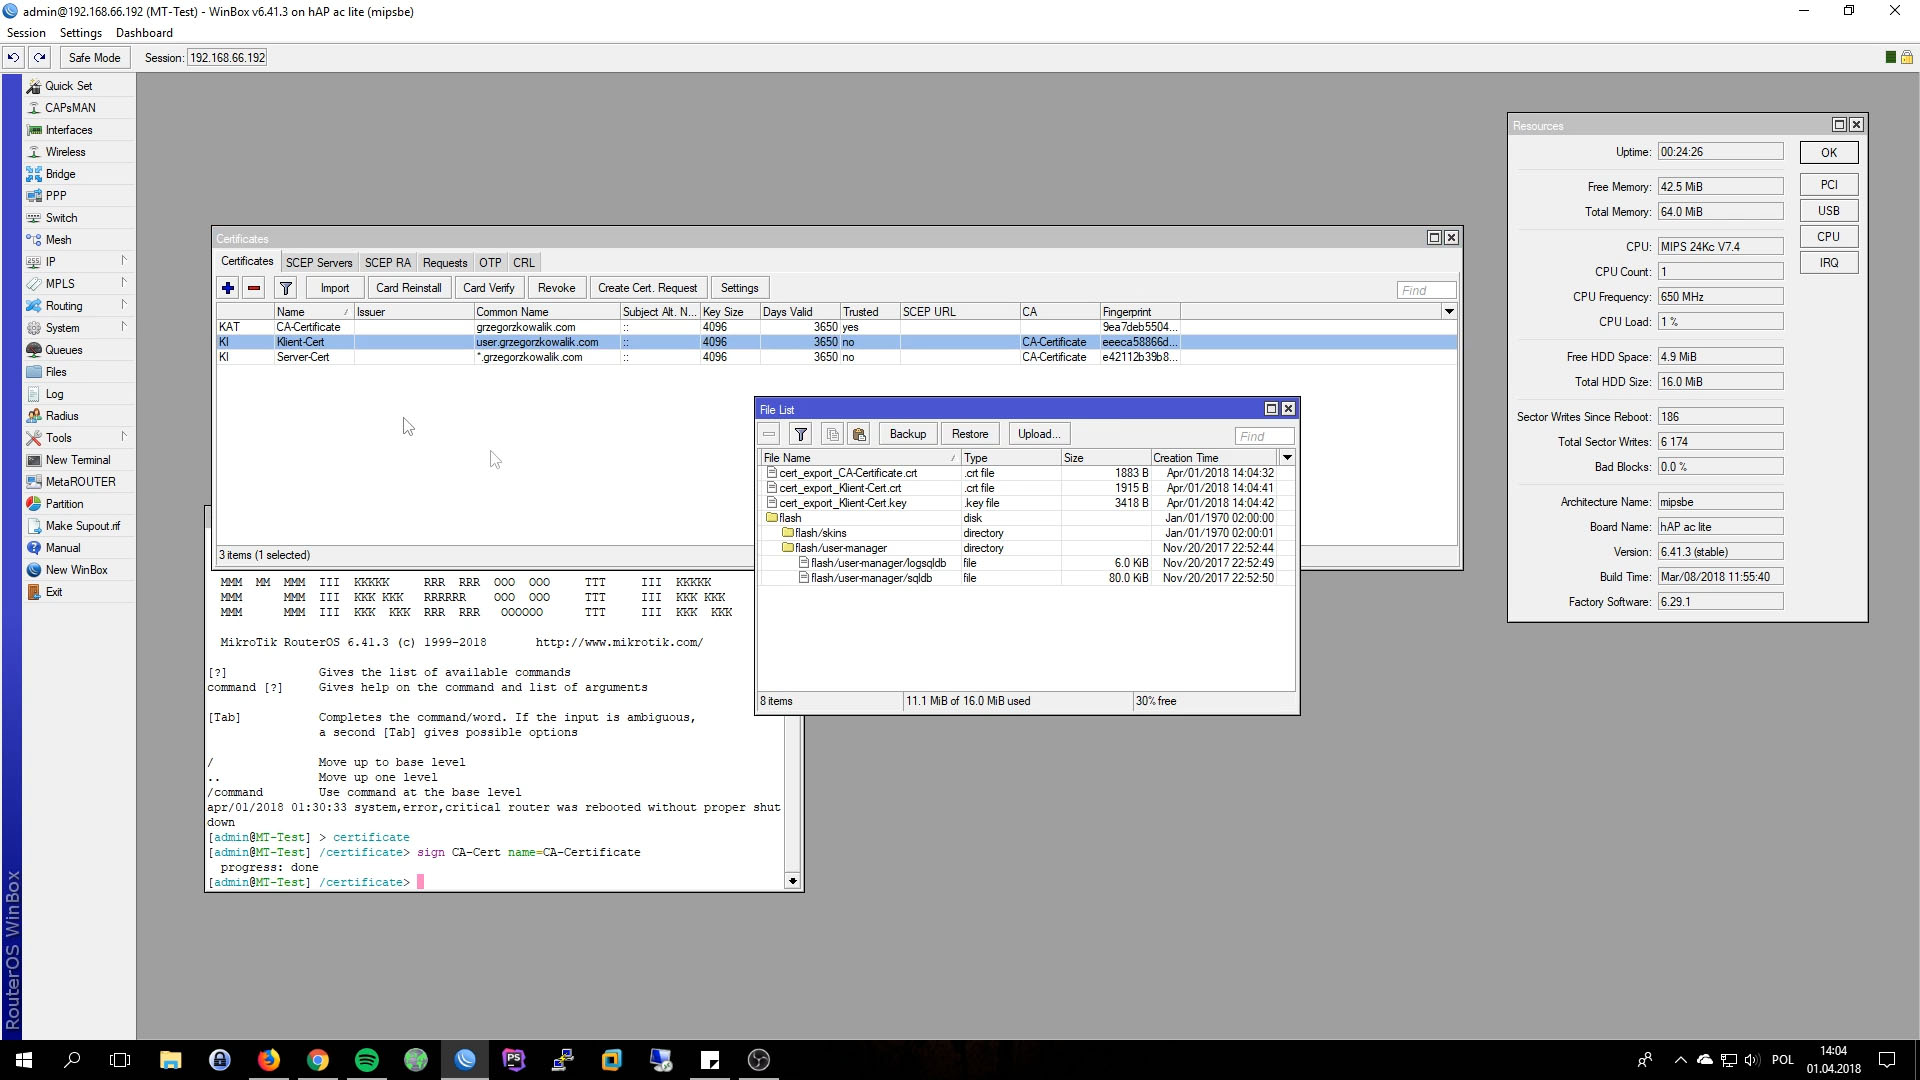
OpenVPN Client using certificate by defualt, in next step we will export Certificates from Mikrotik. Right click on CA and Export. Remember to set password, otherwise key wont be exported. We can find certs in File. Use drag&drop to copy certs to desktop.
Adding IP Pool for VPN Clients
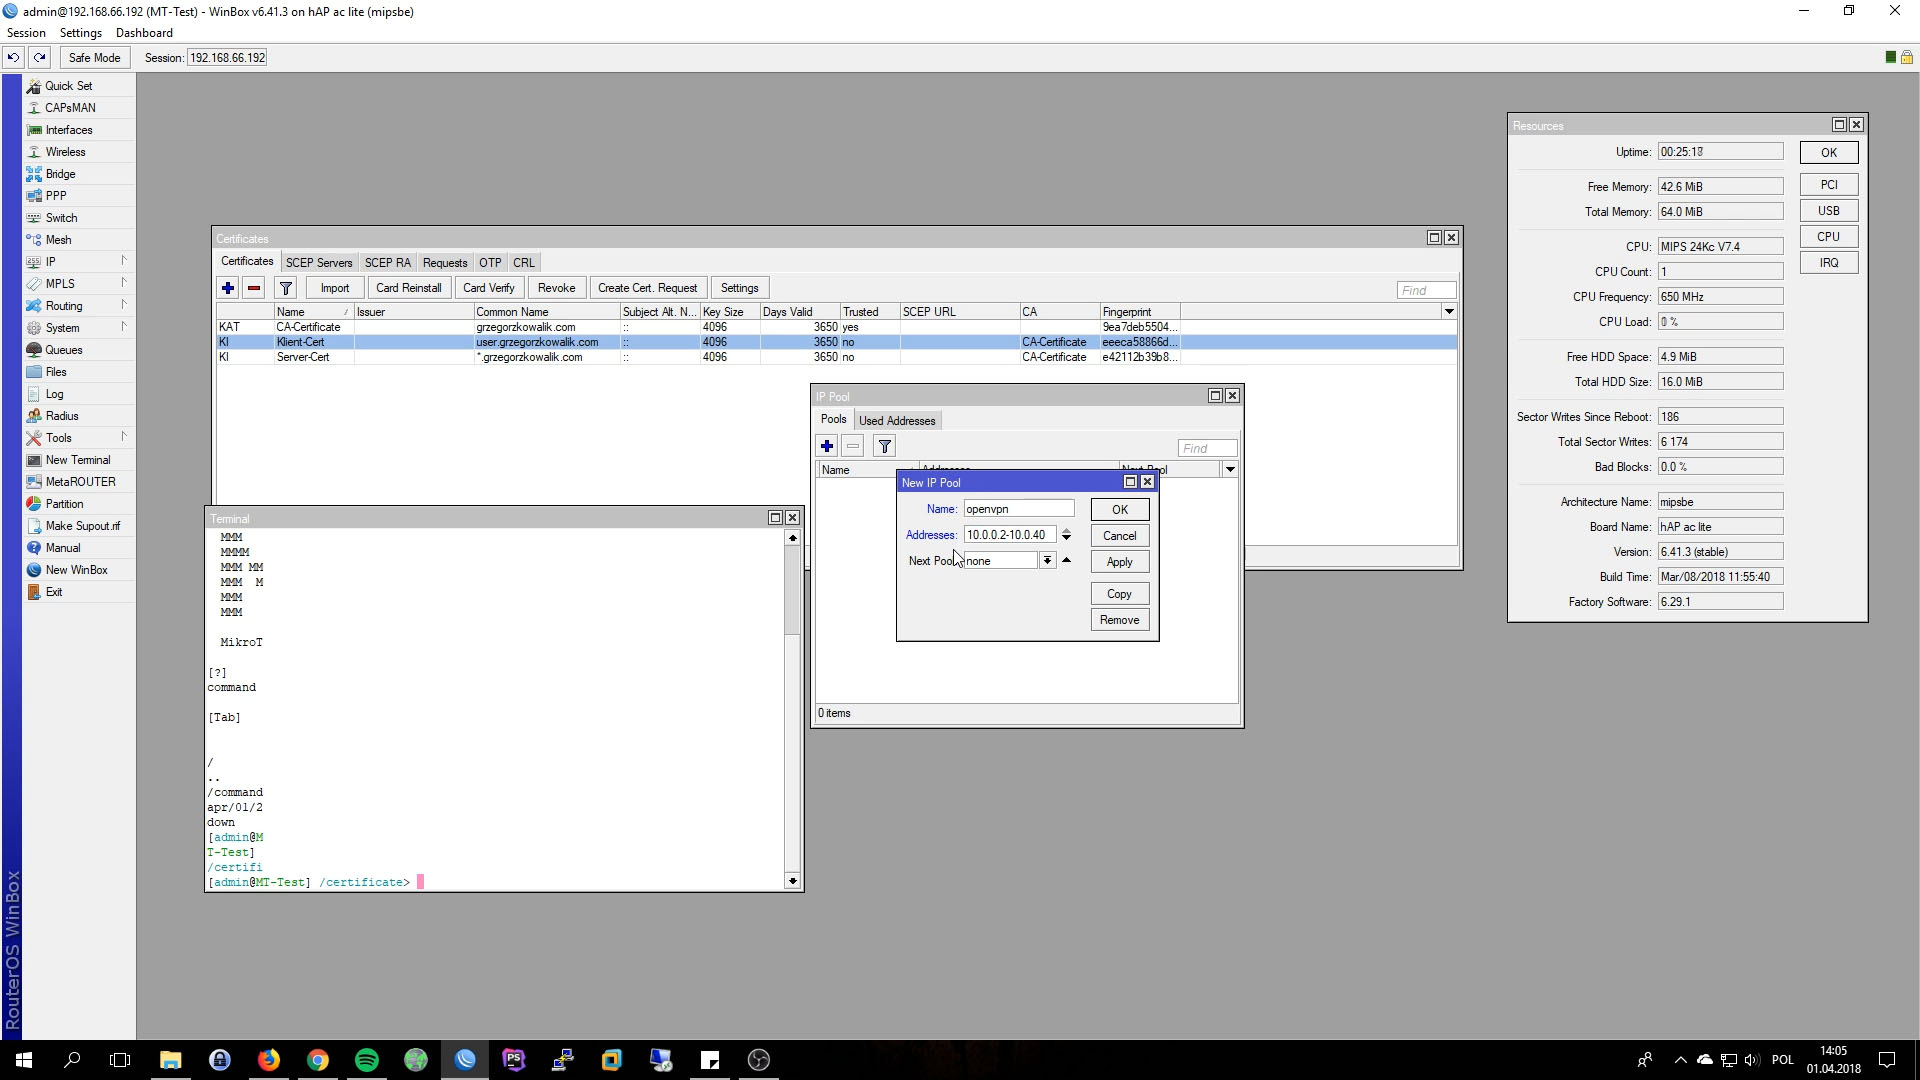
From side menu click on IP and Pool.
- Name: anything
- Addresses: ip range or whole subnet
- Next Pool: None
OpenVPN Server Configuration
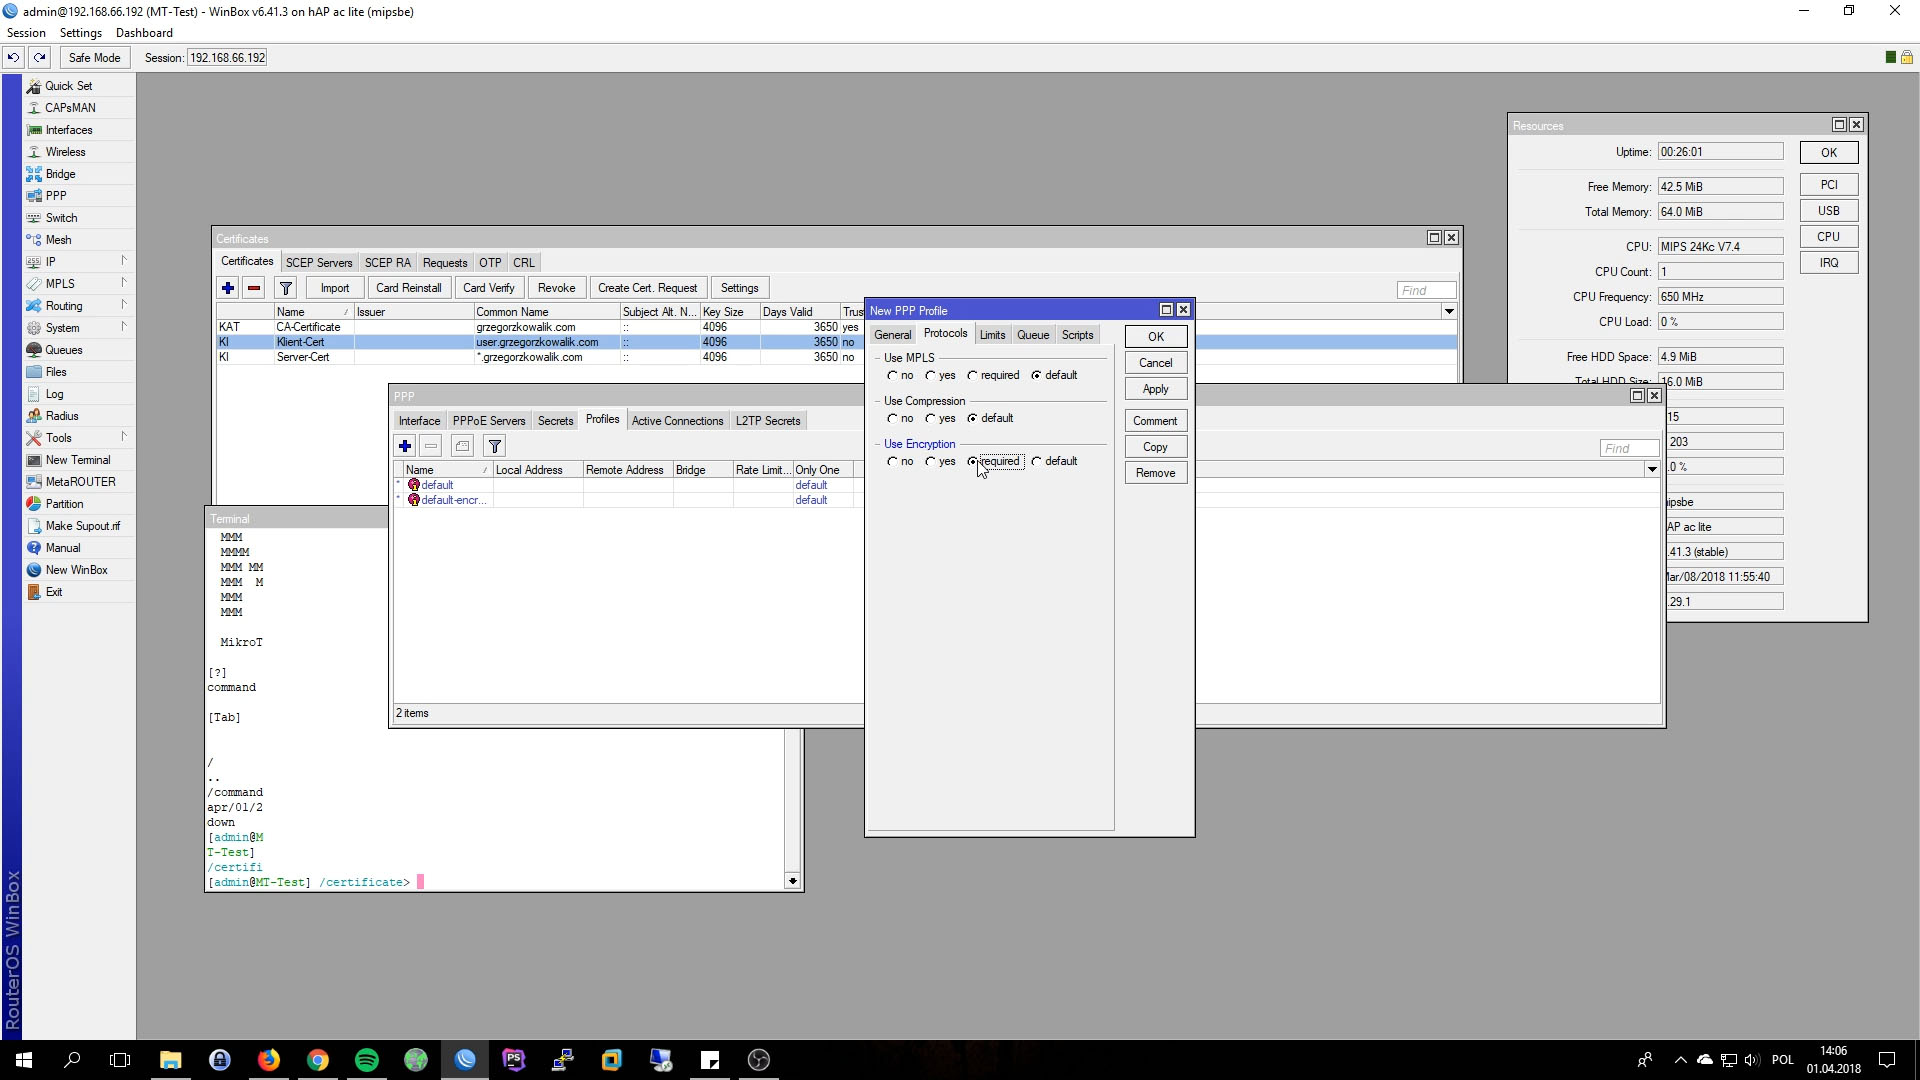
Click on PPP from side menu, choose Profile and create new Profile.
- Name: anything
- Local Address: use same subnet as vpn pool before, ex 10.0.0.1
- Remote Address: vpn pool created before
- DNS Server: public or local dns server
- Use Encrytpion: yes
Switch do Secrets and create new topic. Its very important that Common Name(without domain) from User Certificates must be the same as Secret Name. Few steps before we generated user cert with common name user.grzegorzkowalik.com so secret name must be set to “user”
- Service: ovpn
- Profile: profile we created before
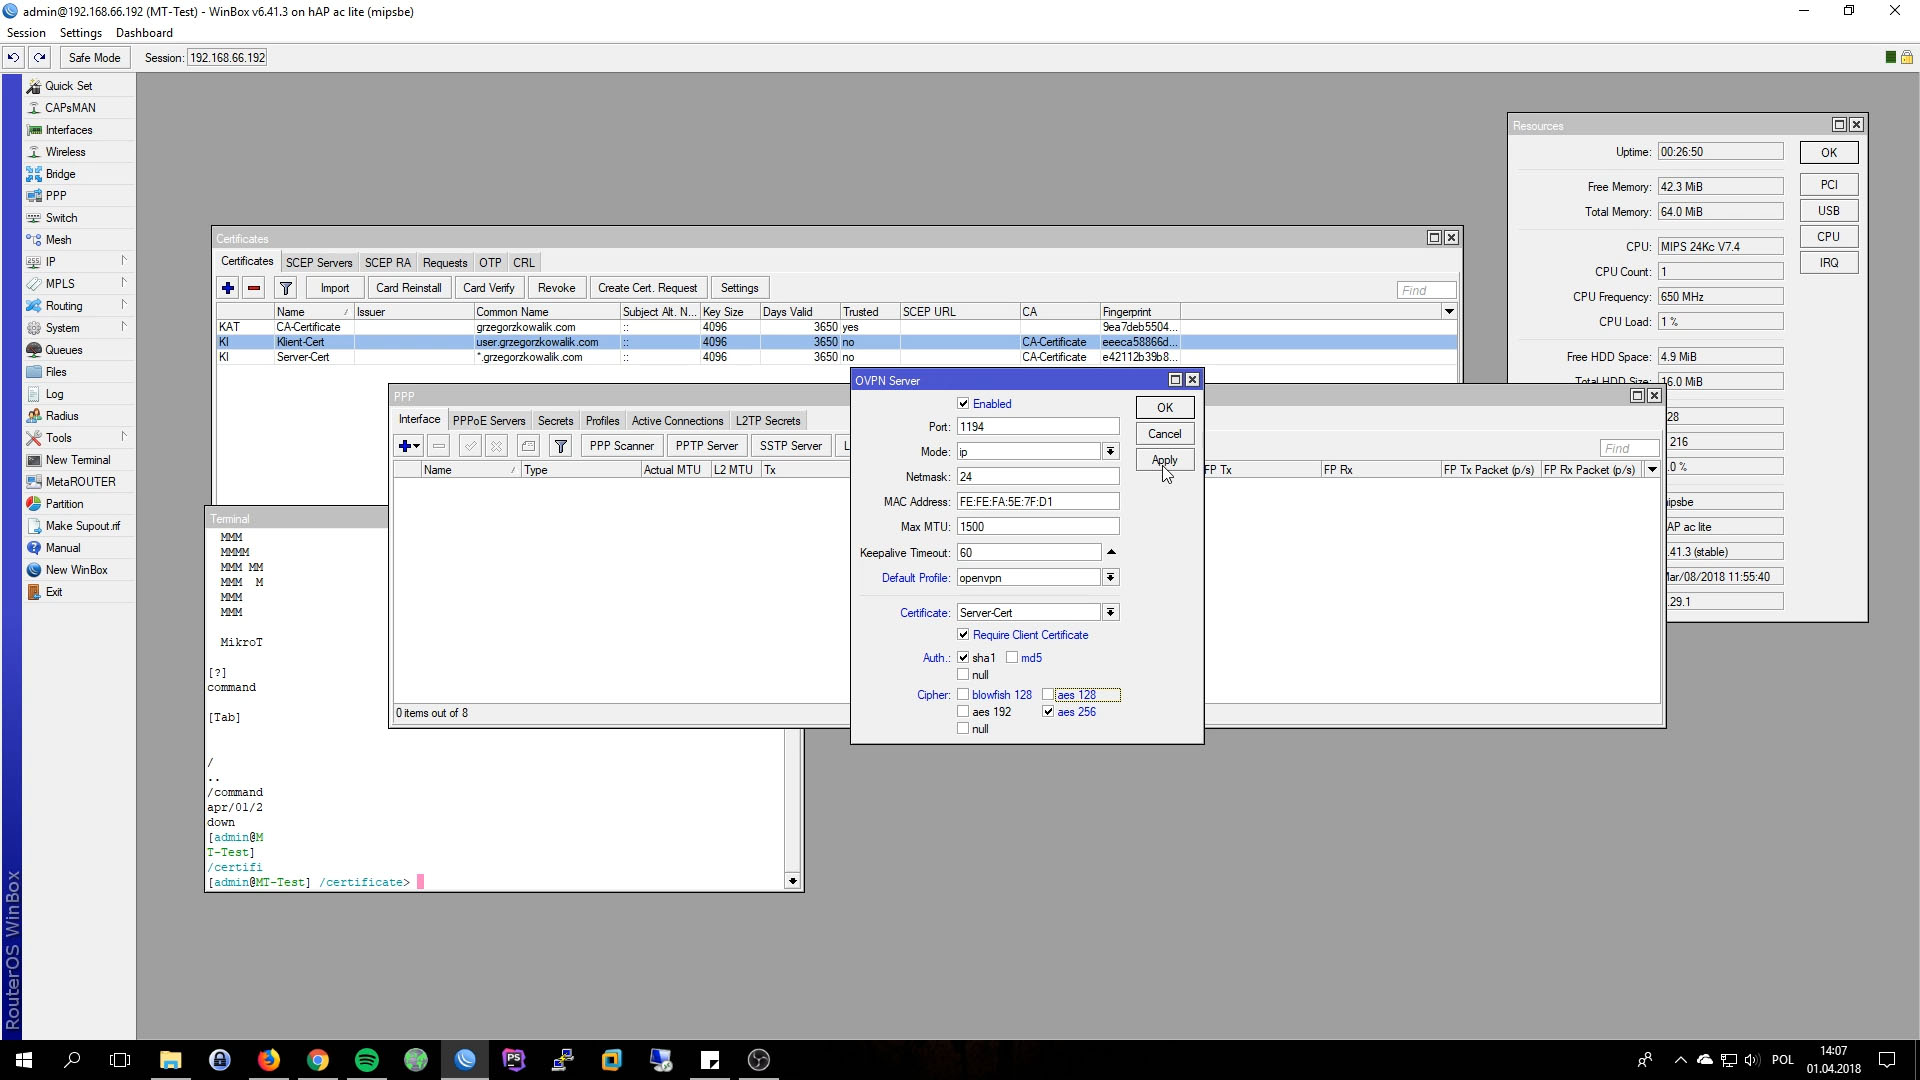
Almost last step is activate OpenVPN Server Interface.
- Enabled: checked
- Port: 1194
- Mode: ip
- Netmask: 24
- Max MTU: 1500
- Default Profile: openvpn
- Certificate: Server-Cert
Preparing Firewall Rules
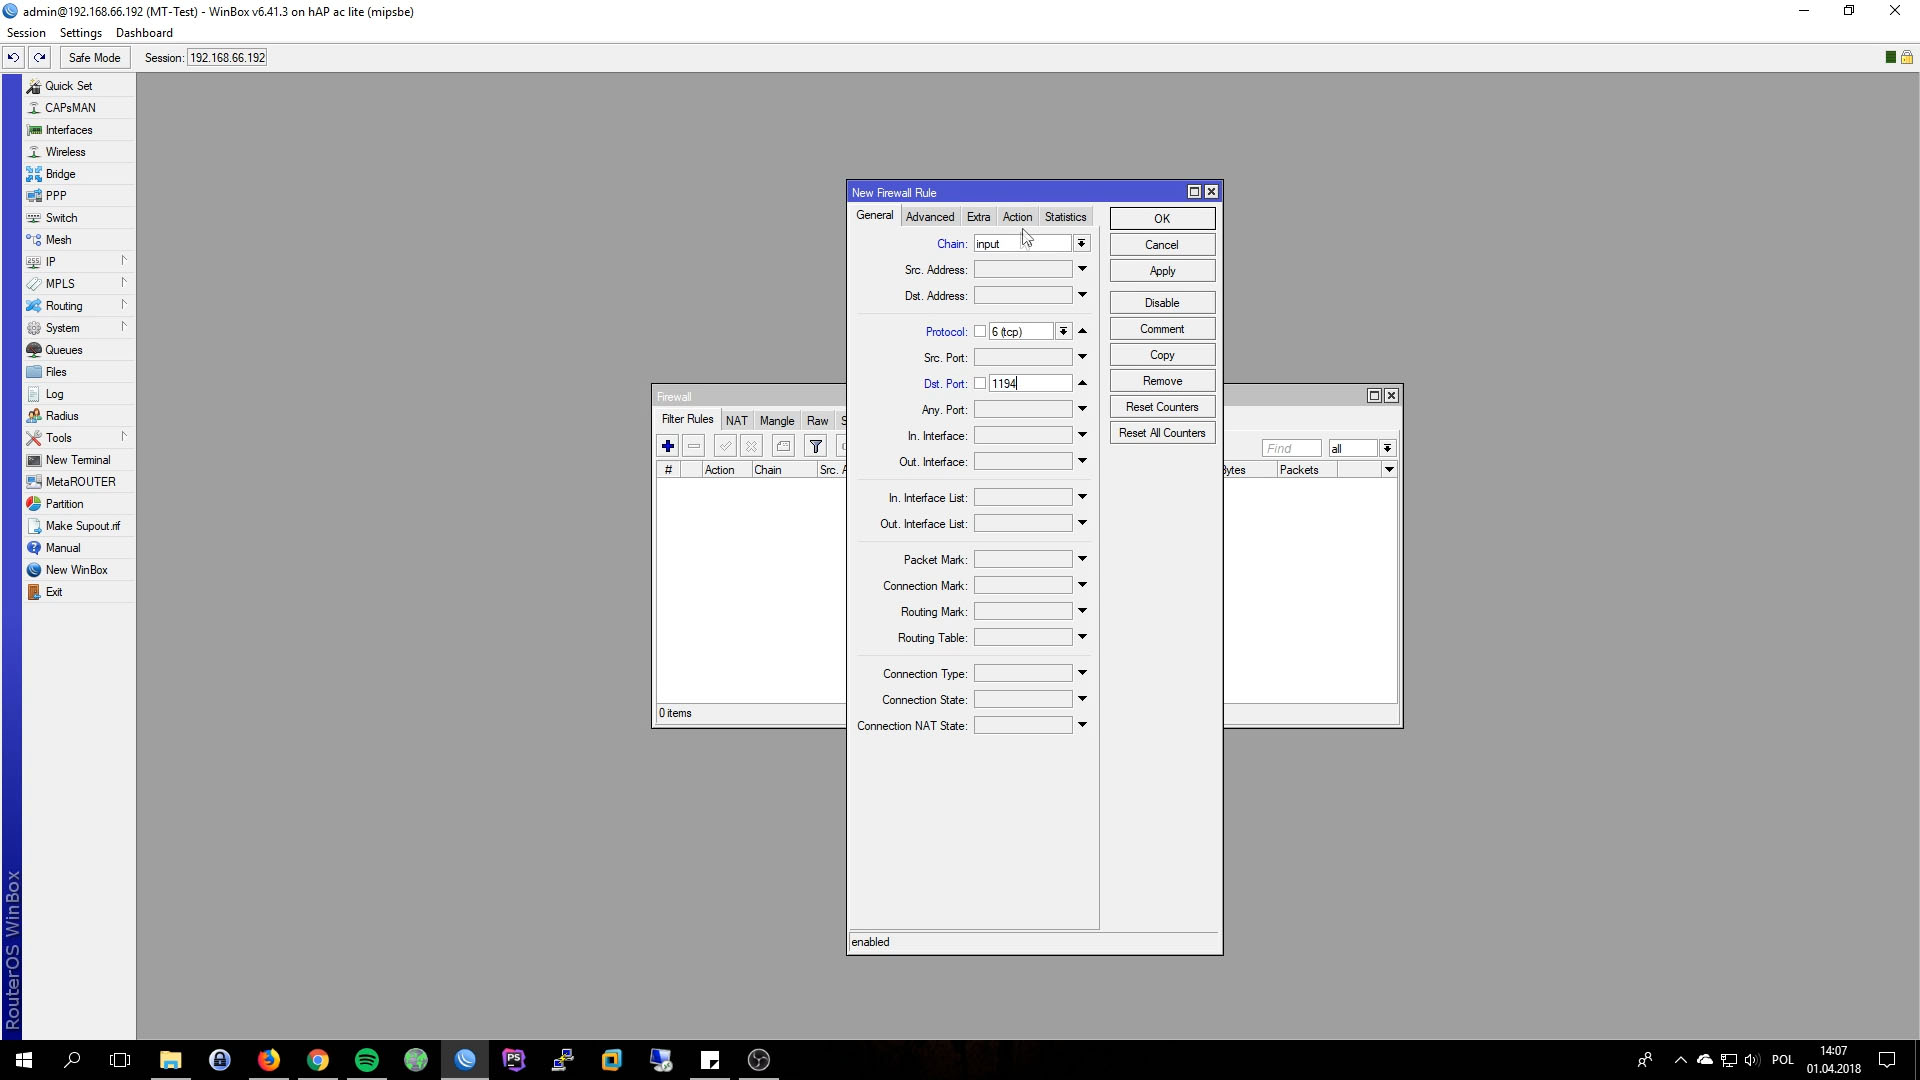
Last step is allow connections on 1194 tcp port. From side menu choose IP then Firewall. Add new rule
- Chain: input
- Protocol: tcp
- Dst. Port: 1194
- Action: accept
OpenVPN Client – Windows 7/10
Download latest openvpn client. Import exporeted certificates. Depend on OS it should be C:\Users\user_name\OpenVPN\config or C:\Program Files\OpenVPN\config. Example of .ovpn config:
client
dev tun
proto tcp
remote grzegorzkowalik.com 1194 #Public IP of router or domain with record A
resolv-retry infinite
nobind
persist-key
persist-tun
ca ca.crt
cert user.crt
key user.key
remote-cert-tls server
cipher AES-256-CBC
auth SHA1
auth-user-pass
redirect-gateway def1
verb 3

Hi there, will this setup work with certificates only on the client side, or does the client also need to provide a username/password?
hi, username and password are required also.
Hola. Porque cuando me conecto a la vom no navego con la ip publica del servidor, navego con la ip publica de la operadora del cecular.
Parece que no tienes una dirección IP pública permanente
Grzegorzu, zauważyłem że w moim przypadku (OVPN na Mikrotiku i client iOS) adres IP pozostaje adresem telefonu (LTE) a nie jest adresem Mikrotika. Sprawdzam używając whatsmyip.com i podobnych. Czemu tak się dzieje? Chętnie zrozumiem jak to działa, i czy da się to zmienić. Jeśli tak, to jak? Czy i bez tego wszystkie dane przesyłane z mojego telefonu są chronione, czy przydaje się to tylko pod względem dostępu do sieci lokalnej z zewnątrz?
To zależy od routing. Wskazując na 0.0.0.0/0 cały ruch z telefonu powinien lecieć przez MT. Także przy sprawdzaniu publicznego adresu powinieneś zobaczyć ten z MT.
Witam, troche stary juz post ale mam nadzieje ze dalej aktualny. Pytanie bo nie potrafie zrozumiec co sie dzieje. Po wykonaniu wszystkiego jak Pan opisal, polaczenie dziala bez problemu ale tylko na telefonach. Gdy importuje config na Windowsie 11 do klienta OpenVPN, polaczyc mi sie udaje, jednak calkowicie nie dziala DNS. Testowalem juz i na androidzie i na iOS, normalnie wszystko chodzi bez problemu, a moj komputer z W11 nie przepuszcza DNSu. Co moze byc problemem?
Zobacz w statusie połączenia od openvpn co masz w polu DNS.